
How to use Amazon Cloud for hands-on Labs
Amazon Elastic Compute Cloud (EC2)

The Amazon Elastic Compute Cloud (EC2) is public Cloud infrastructure and a central part of the Amazon Web Services offering. Amazon EC2 allows users to run Virtual Machines in an on-demand way, and run their own software and computer applications as if they were owned by the users directly. the EC2 Cloud also enables users to create scalable internet applications and distributed systems with multiple virtual machines.
In EC2, an instance is a running and deployed virtual machine in the cloud. Instances can include any software the user directed, and is uaually based on a pre-existing virtual machine image, saved in EC2. Users can create, stop, and terminate instances at will, and are charged per hour of runtime.
EC2 in the Cloud Workshop
This workshop will rely extensively on the use of Amazon EC2 for computing services and deployed software. Specifically, all of the workshop software and tutorials have been built into a publicly available EC2 image for use not only in the workshop, but also afterwards. To speed up the workshop, VM instances have already been booted and prepared for you and login credentials will be distributed upon arrival.
Booting your first instance in Amazon EC2
This tutorial shows you how to boot your first Amazon EC2 virtual machine instance. It is important that you have an AWS account to start with.
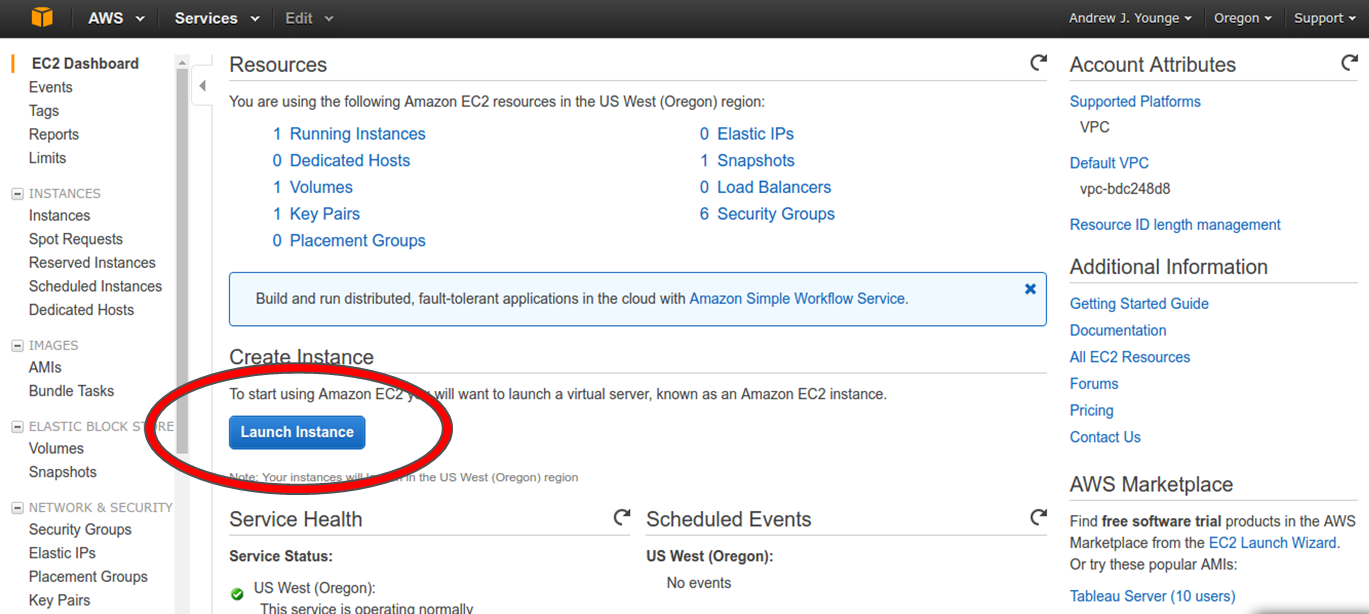
- First, go to http://aws.amazon.com and click “Sign in to the Console” in the top right corner.
- Once at the initial dashboard, we can look to stat launching our first instance. Click “Launch Instance” in the middle of the page.
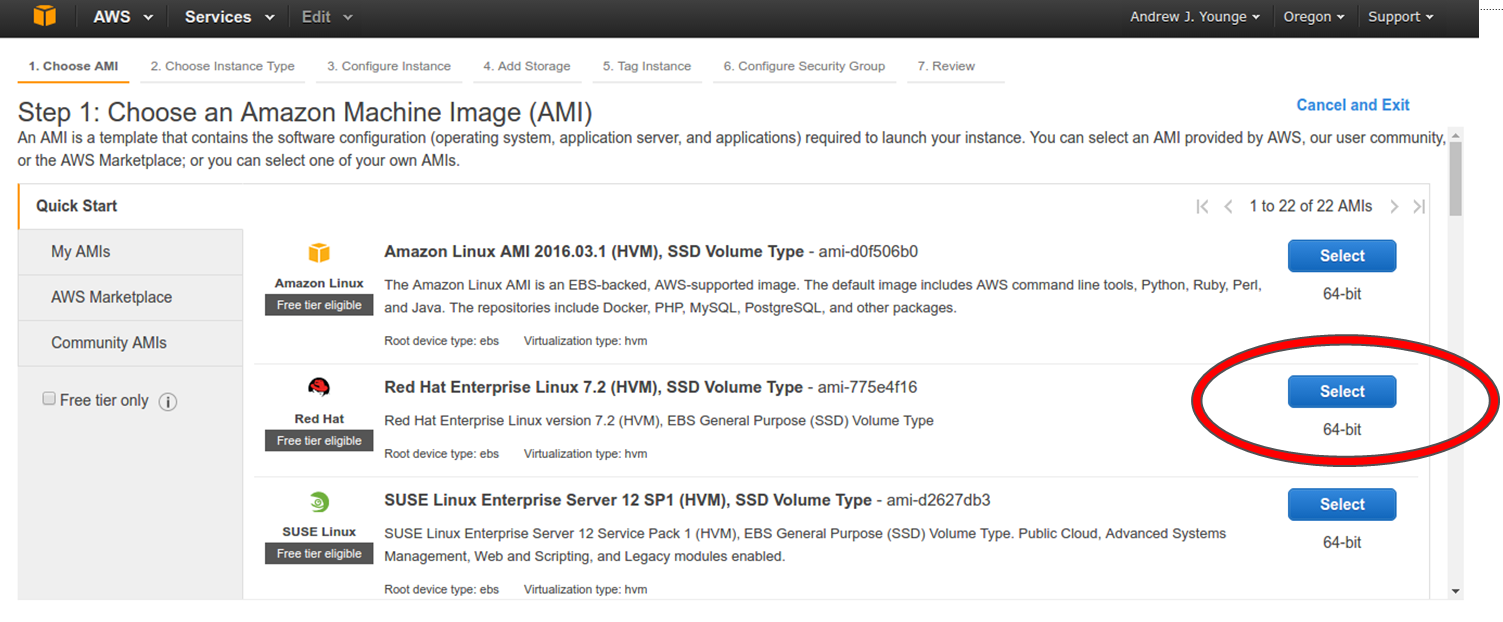
- Here, we can select our desired image from a group of base OS images. We recommend either the RHEL7 or Ubuntu 14.04 images.
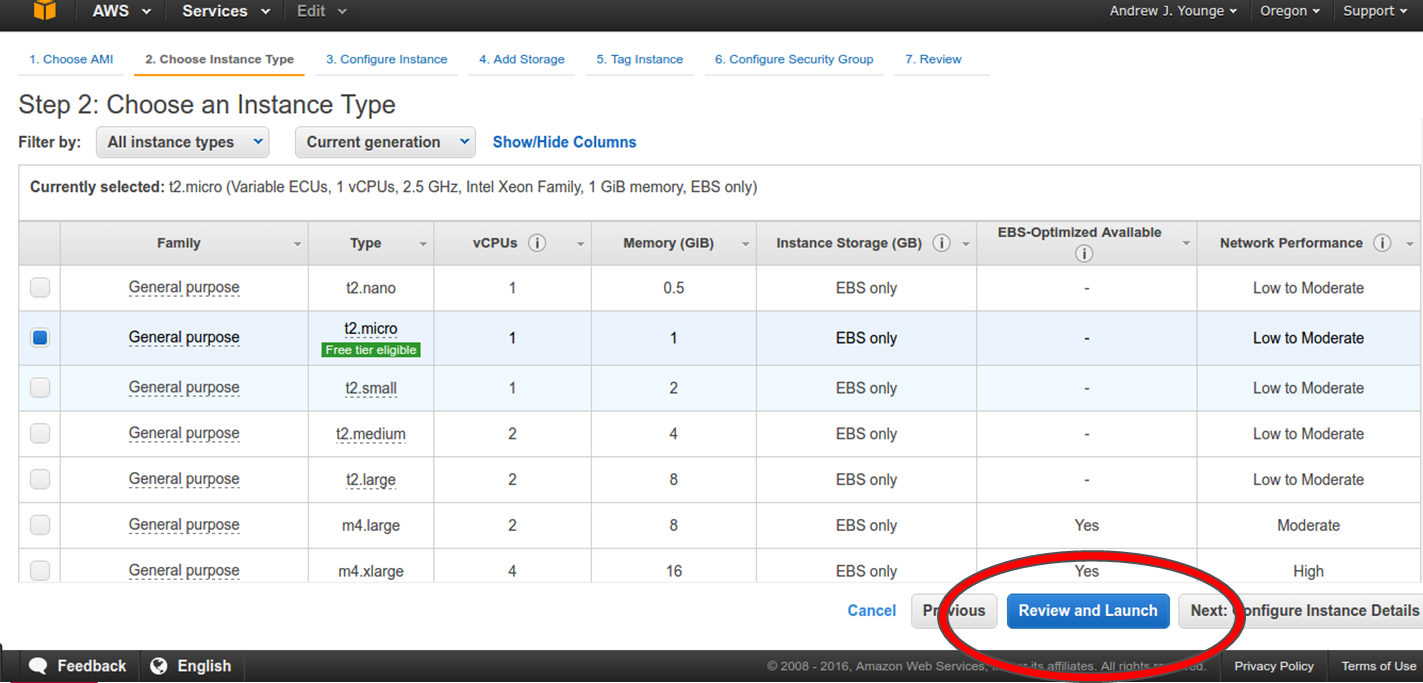
- Now we have to select an instance type. This defines how large our instance will be in terms of computing resources. However, we have to pay attention of what the cost of each instance type is, as the bigger the instance type, the more expensive it will be to use. For our purposes, a t1.micro instance will work fine and also will be part of the free tier.
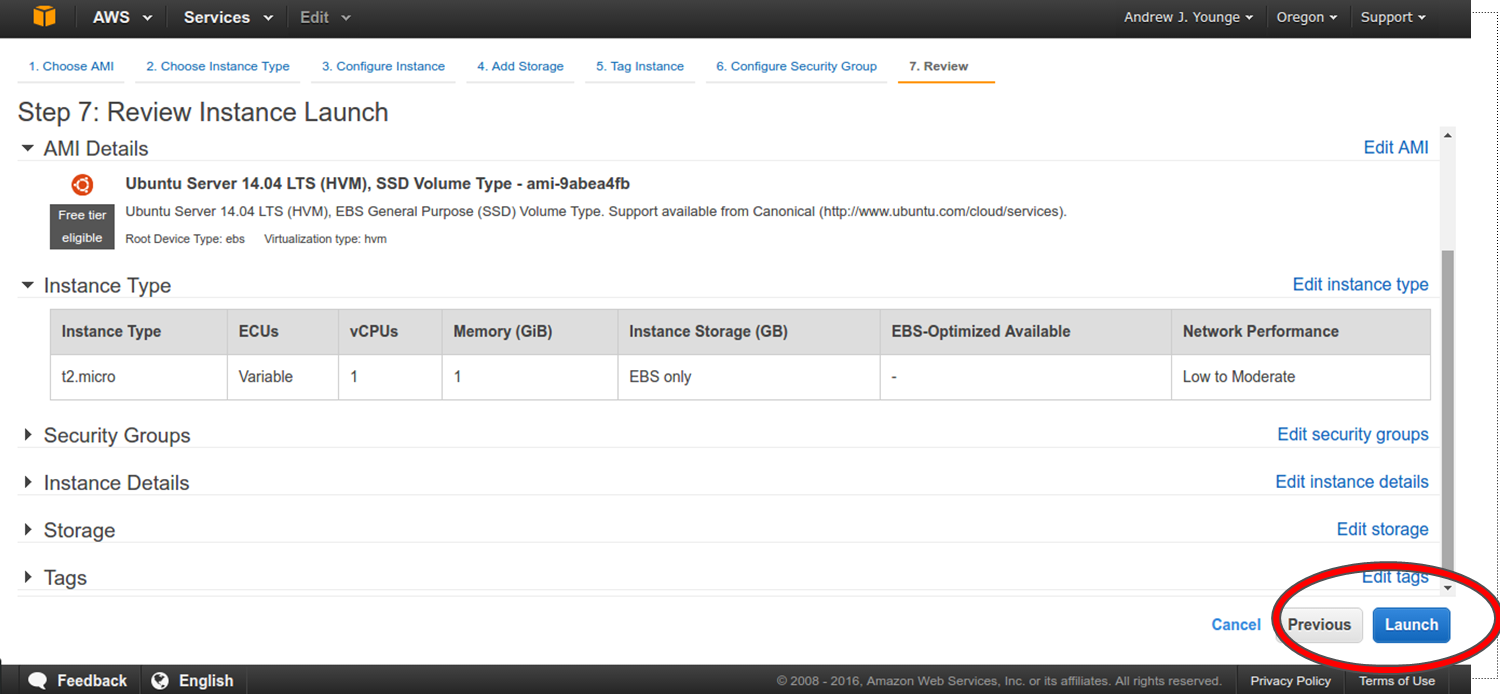
- Then, we need to review our instance details. Be sure you are satisfied with all settings before clicking the “Launch” button.
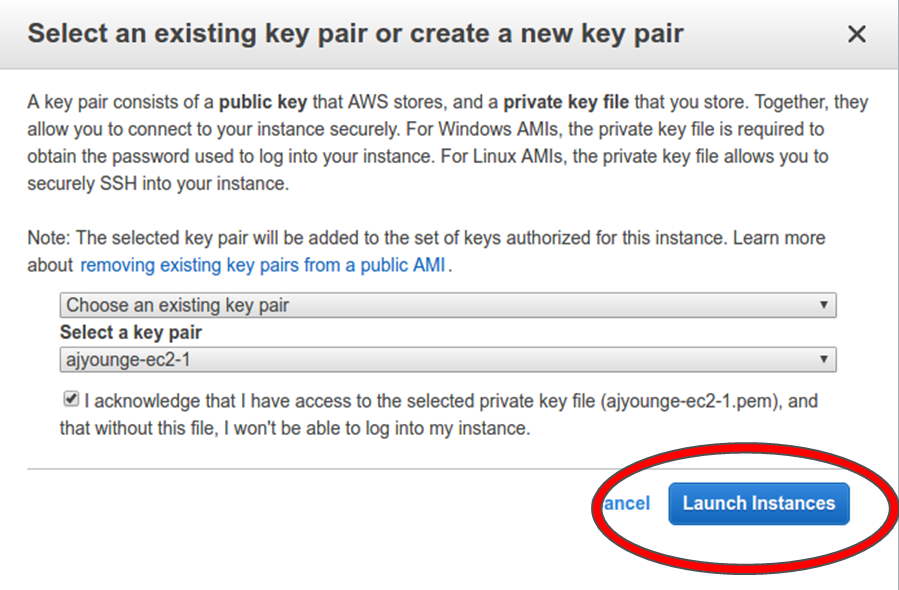
- Before the instance can be loaded on the EC2, we need to specify which keypair we are going to use. If you already have a configured keypair, just select one to use. If not, you can create a new keypair and give it a name. This will also allow you to download your private .pem key, which you can use to SSH into the instance.
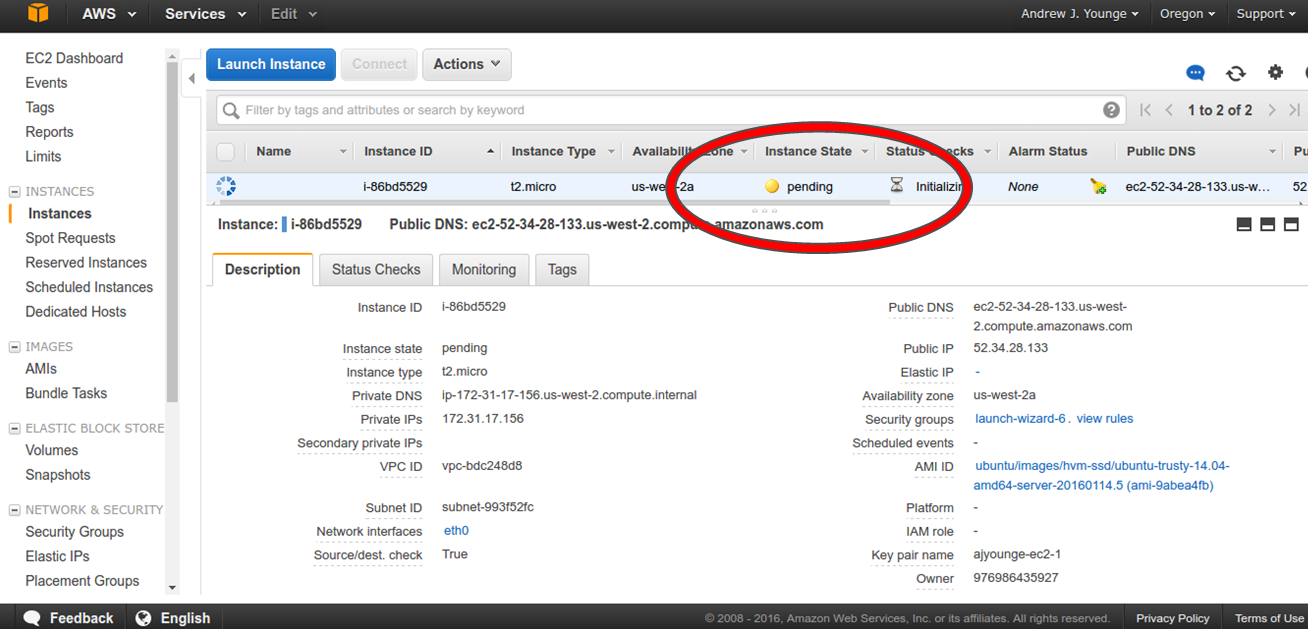
- Once launched, the instance will initially be in a “Pending” state. This means the instance is being provisioned somewhere in the Amazon cloud.
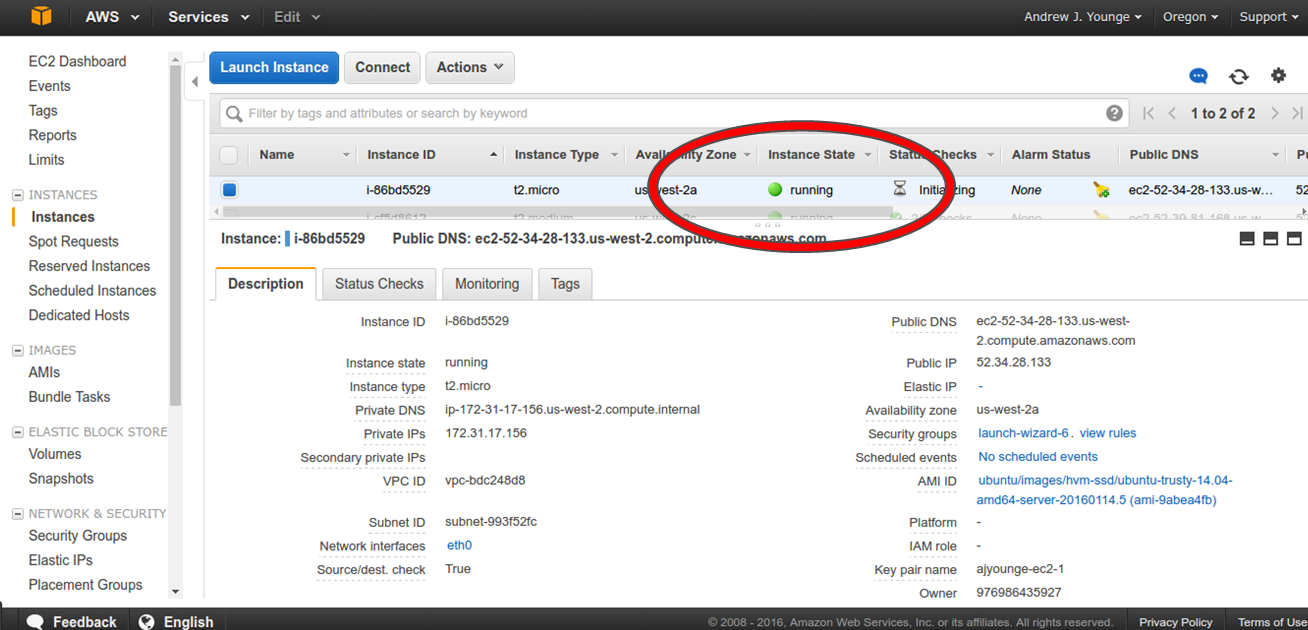
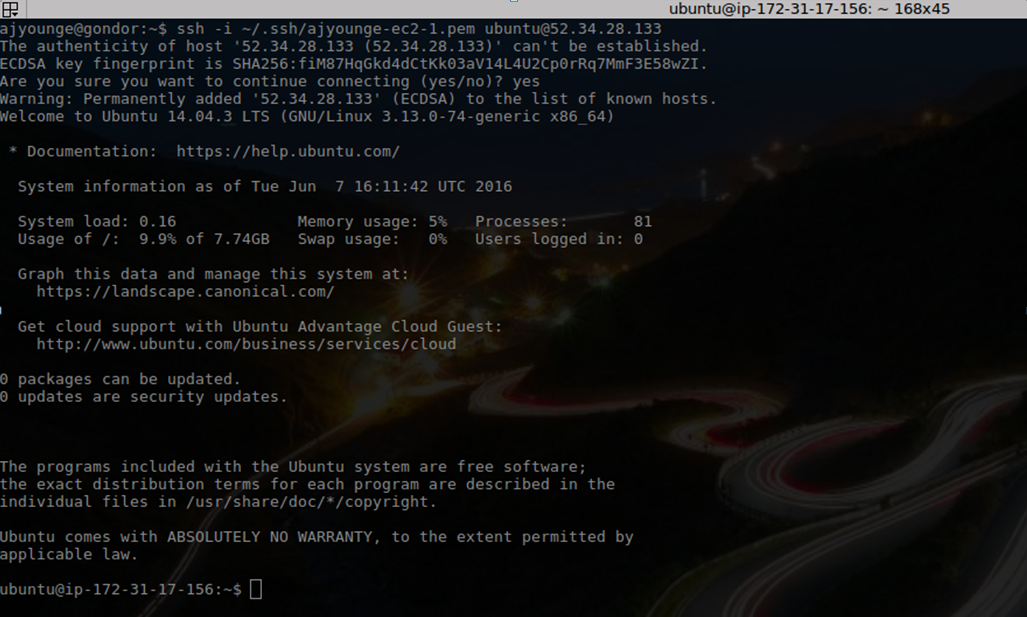
- Eventually, the image will change into a “Running” state. This means the instance has been created. However, you should note that this does notmean the intance is ready for use, as the OS still has to boot up within the instance. Luckily, Amazon’s instances are well tuned so boot up should only take a few seconds. Also note the public IP address given, as we need this to SSH to the instance. In our example here, this is 52.34.28.133.
- Once the instance is in the running state and you’ve allowed a few seconds for the OS to boot, you can ssh into the instance. You will need to use your private .pem key, as shown below, with the user “ubuntu” and the IP address found above.
- While the instance is running, we can manage the state within the AWS console if desired, This includes options like stopping or terminating the instance, reconfiguring the network, or attaching EBS storage to the instance.
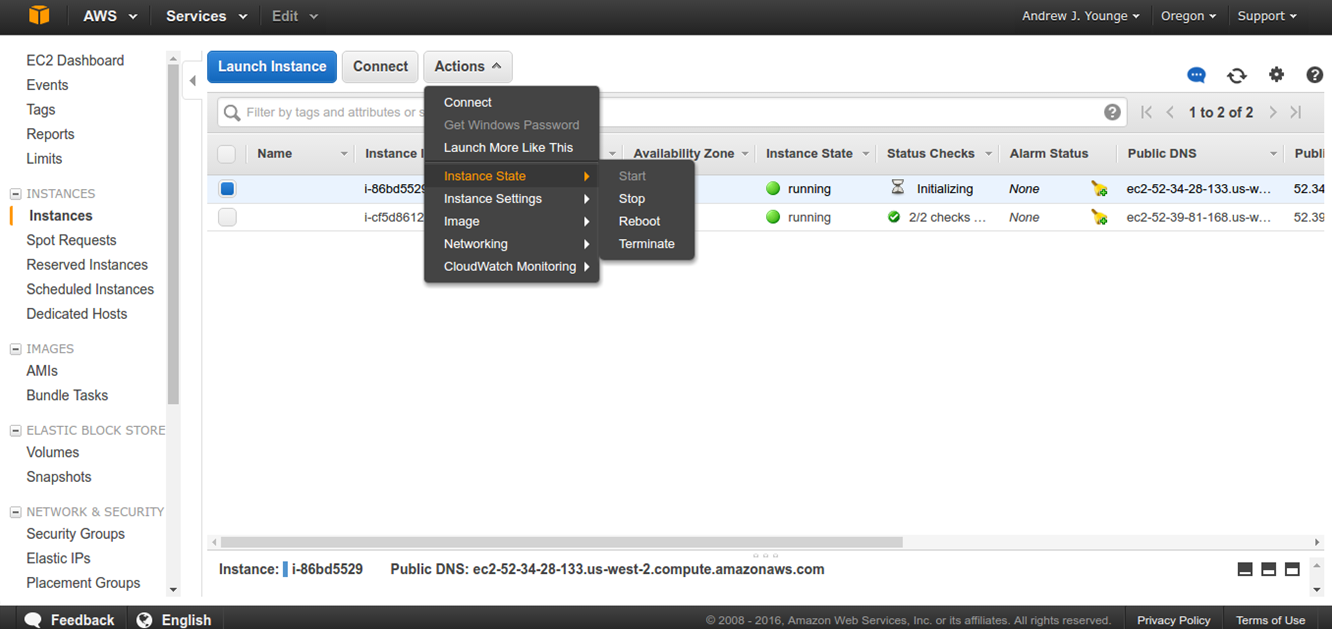
- When you are done using the instance, make sure to terminate it using the menu. This will stop you from being billed for leaving an instance running.
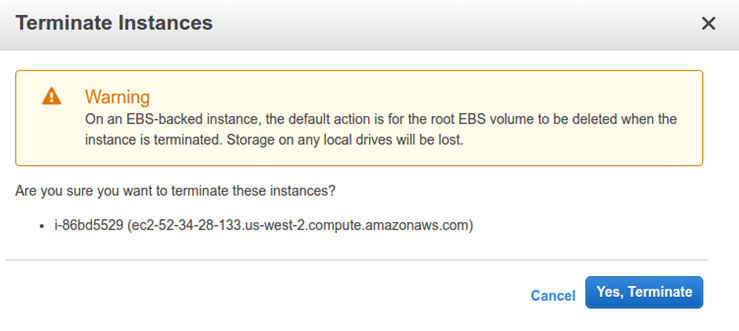
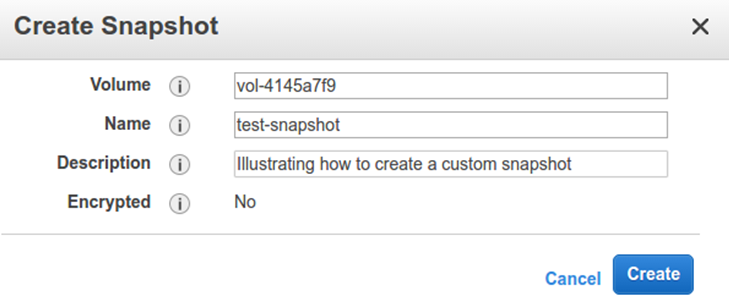
- You should note that terminating your instance will destroy all changes you have made during the session. As such, you need to back up any data or it will be lost. You have a few options, but one of the most common options is to create a new snapshot image of the instance. This will preserve the filesystem and configuration, and allow you to boot more instances based on the snapshot at a later time. Other options for saving your data could include mounting a EBS volume, saving to S3, or copying your data to your own private machine.
Logging into EC2 Instance
You will be assigned your own personal VM instance via a piece of paper. This will include two things: a IP address and a unique password. From here, you will log into the VM via SSH.